If you want to Install Windows 11 on Any Windows 10 PC without Data Loss, this guide shows you how step by step you stay in control and keep your data safe. Many people hesitate to upgrade because they worry about losing important documents, photos, or applications during the install process. By doing an in place upgrade directly from Windows 10 to Windows 11, the setup keeps your personal files and installed programs intact while replacing the operating system files. This method ensures you keep your data exactly where it is and gives you access to the latest Windows?11 features on your existing PC.
Install Windows 11 on Any Windows 10 PC without Data Loss
Why You Should Upgrade Carefully
Windows 10 support will end soon, so upgrading to Windows 11 keeps your system supported and secure. A proper upgrade avoids wiping data and settings off your PC. Before you begin, understand that Microsoft’s official tools are designed to preserve your files, but some older or incompatible devices might need special steps to complete the upgrade without losing anything.
Check System Readiness
Before you start, check that your Windows 10 PC is fully updated and ready. Open Settings, go to Update and Security, then check for updates. Install all available updates so the system is on the latest version of Windows 10. This makes the upgrade smoother and avoids errors during installation. Even if your PC does not meet Windows 11’s official minimum requirements, there are ways to proceed, but doing so comes with risks and may affect update support later.
Back Up Your Data First
Even though the upgrade is designed to preserve files, you must back up important data before you begin. Use an external drive or cloud storage to copy your documents, pictures, and anything you cannot afford to lose. This safety net means you will not lose data even if something unexpected happens.
Download the Windows 11 Installation Files
Go to the Microsoft Windows 11 download page and get the Windows 11 Installation Assistant or the latest ISO file from Microsoft’s official site. If you use the Installation Assistant, the tool will automatically prepare and launch the upgrade inside your current Windows 10 environment. Because this process is automatic and guided, you keep all your files, settings, and applications in place while Windows 11 replaces the core system files.
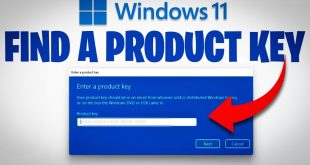
Please keep in mind that your operating system should be activated with a product key to upgrade the latest OS but if you don’t have a license, you can Buy it Now.
You can also check: Microsoft Authorized OEM Distributors in the World
Start the InPlace Upgrade
Once you download the Installation Assistant or mount the ISO, run the setup file inside Windows 10. A prompt will appear asking if you want to upgrade your PC. Make sure the option to keep personal files and apps is selected. Follow the on?screen instructions and proceed with the install. Your system will restart several times. At no point should your files disappear if you selected the right options.
What Happens During the Upgrade
During the upgrade, Windows carefully replaces system files while keeping your user data and software intact. Installed programs remain where they are, and your personal folders are preserved in the exact location. After rebooting into Windows 11, you should find everything just as it was on Windows 10, only under the new system environment.
Troubleshooting Compatibility Issues
If your PC does not meet Microsoft’s hardware requirements, the upgrade might not begin normally. Some users bypass strict system checks by using tools like Rufus to create adjusted installation media or altering registry flags that allow the setup to continue on unsupported hardware. These methods may help complete the upgrade and keep your data, but they involve risks and are not officially supported. Always download tools from trusted sources to avoid malicious software.
After the Upgrade
When Windows 11 finishes installing, your system will load to the new desktop while keeping your files, apps, and settings unchanged. Take a moment to verify everything is working as expected. Install any pending updates from Settings > Windows Update to ensure your system is current and secure. After upgrading, You OS will be activated automatically.
Final Advice
Installing Windows 11 without losing data is straightforward when you use the official upgrade path from Microsoft and keep your files backed up before beginning. Even if your PC does not initially qualify for the upgrade due to hardware checks, there are ways to work around those limits but you must weigh the risks and always protect your data first.
With the right preparation, you can move your Windows 10 PC to Windows 11 and hold onto everything you value on your machine.